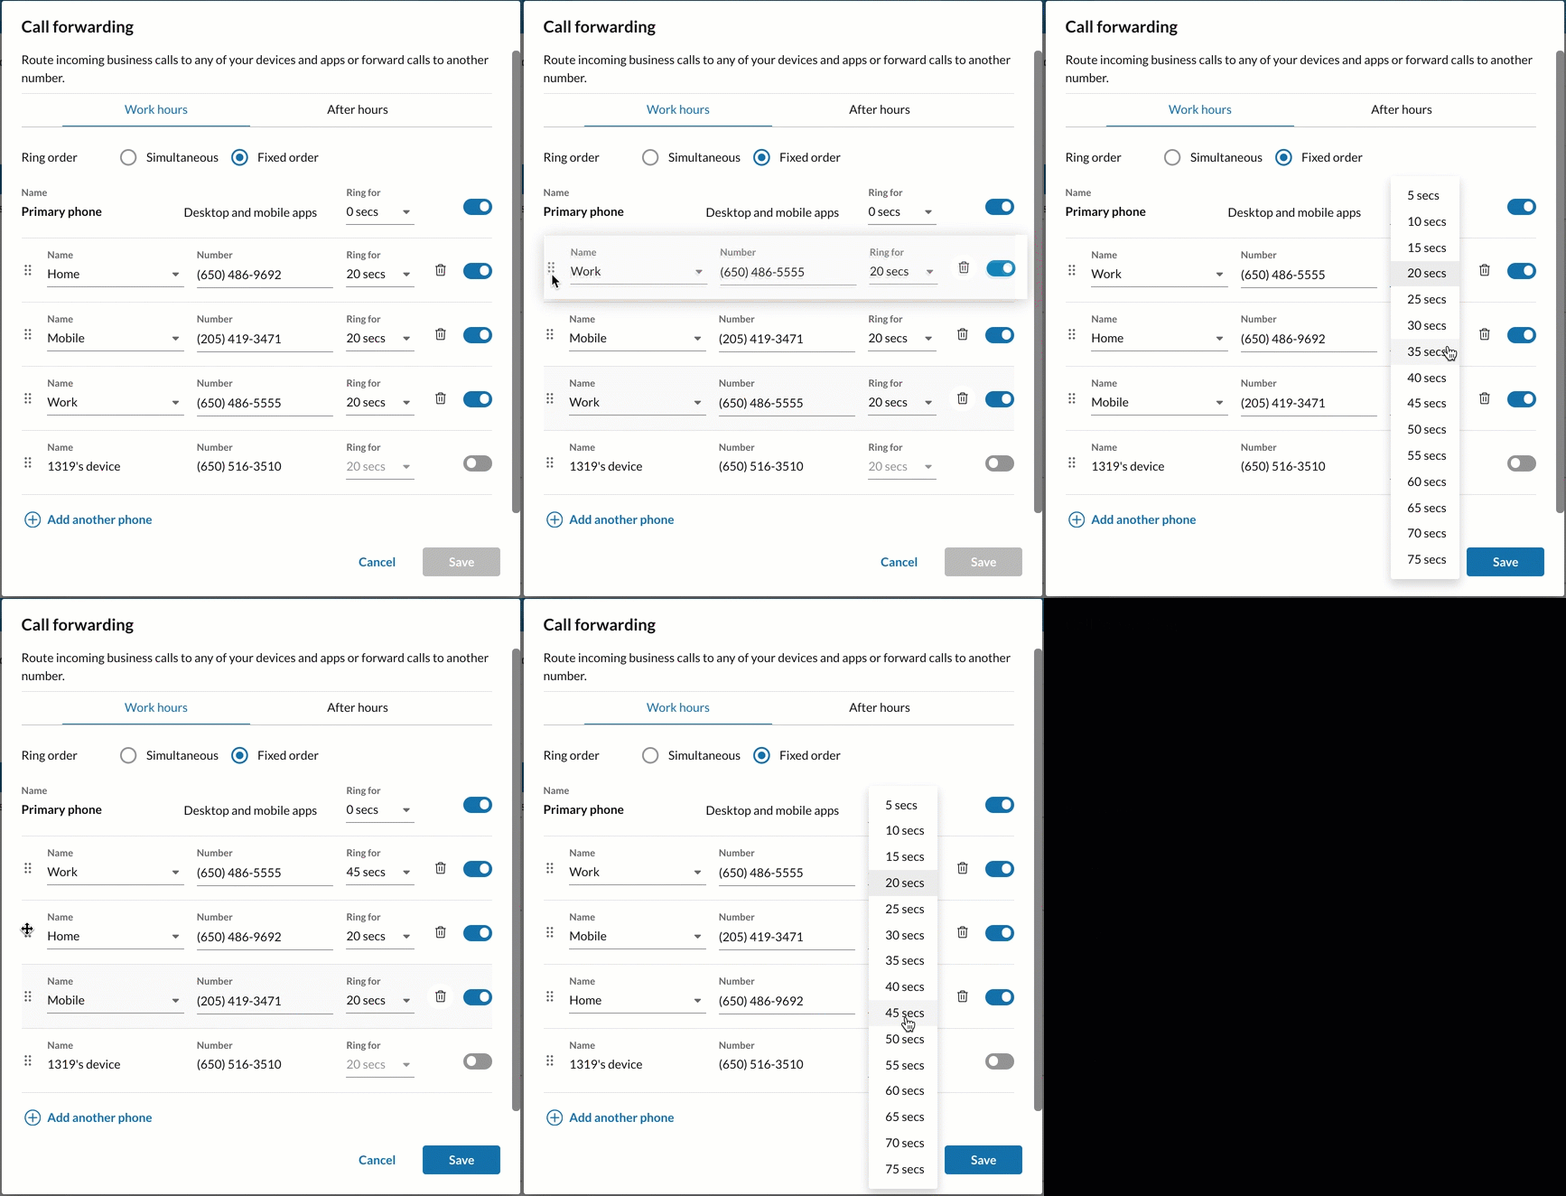
You can configure call forwarding during the account setup process and make changes later in Phone settings.
Setting up user call forwarding during account setup
Configuring this feature during account setup is only for small and medium business (SMB) customers. Not sure which customer you are? Click here to learn more. Read RingEX and Video plans to learn more about different plans.
1. Click Review or Edit on the Review your call handling card.
2. Click Call forwarding.
3. Set the Ring order. You can select from a simultaneous or a fixed order.
4. Configure the length of ring time for each forwarding number.
5. Click Save.

Setting up user call forwarding in Phone settings
1. Navigate to Settings via the left-hand navigation bar.
2. Select Phone on the left pane.
3. Scroll down to Incoming calls.
4. Click the Edit button at the far right of Call forwarding to open the Call forwarding window.
5. Configure the length of ring time for each forwarding number.
6. Set the Ring order setting.
a. If Simultaneous is selected, add one or more phone numbers.
b. If Fixed order is selected, add one or more phone numbers and determine the call order.
7. Click Save.
Ring order options
- Simultaneous: Rings forwarding phones at the same time. If you have added multiple phones, you will not be able to change their order.
- Fixed order: Rings forwarding phones one at a time. If you have added multiple phones, your primary phone will always ring first, and then the next phone, depending on how you set the order of your phones. You can reorder your phones by dragging and dropping to your preferred order.