Introduction to Live Reports widgets | RingEX
Last updated on September 01, 2021
Managing dashboard widgets
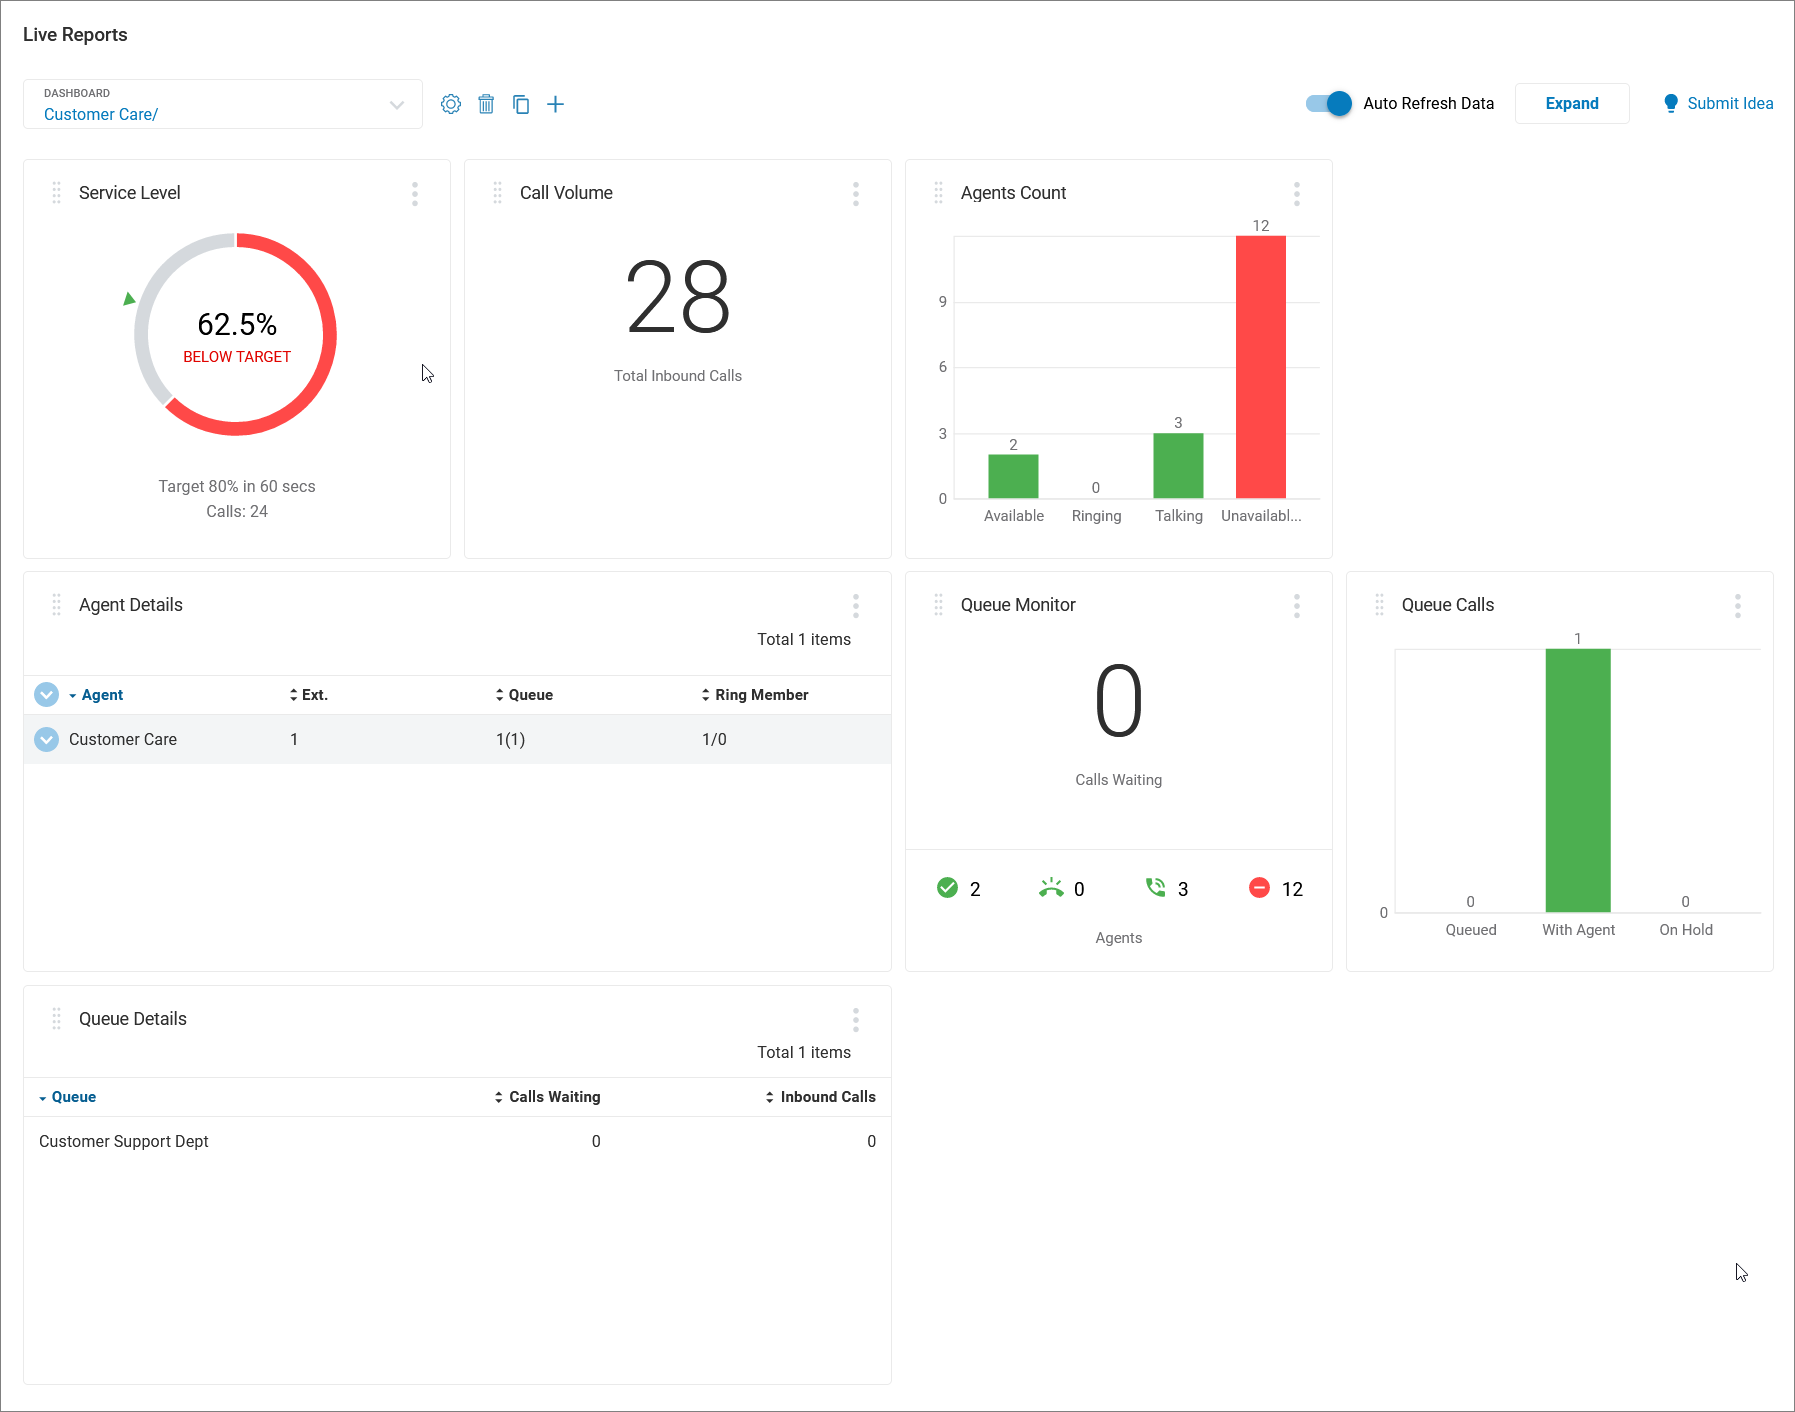
Widgets are the core of dashboard functionality. Each dashboard is populated with categorized tiles that you configure to show the information you need. While every widget requires a name and a queue selection, they reflect a broad array of details to help you understand various data points within your choice of queues.
You can configure widgets for:
- Service Level: The percentage of calls answered within the threshold time.
- Call Volume: Number of inbound or outbound calls, abandoned calls, and voicemails.
- Agents Count: Number of available, ringing, talking, and unavailable agents.
- Agent Details: Tabular widget with agents displayed in rows.
- Queue Monitor: Length of the queue, longest wait time, and availability of agents per queue.
- Queue Calls: Number of calls in a queue, live, and on hold.
- Queue Details: Tabular widget with queues displayed in rows.

Setting call queue local time
Many widget details include local time data for individual queues. Setting a queue’s time zone is done via RingCentral Admin Portal.
- Log in to your RingCentral online account and from the Admin portal, navigate to Phone System > Groups > Call Queues.
- In the resulting list, click on the name of the queue you want to modify, then click Call Queue Details.
- Click Settings, then click Regional Settings.
- Click Edit. A window displays with Regional Settings details.
- From the Time Zone field, click the dropdown arrow and choose the appropriate time zone.
- Click Save.
Generating reports using widgets
To get started generating reports, you’ll need to open an existing dashboard or create a new one by following the instructions in Adding a Live Reports dashboard, then choose at least one widget to configure. Each widget has different parameters to provide you with customizable reports.