Setting the webinar stage view
Last updated on March 15, 2022
Hosts can set their webinar stage to be more impactful and immersive. Hosts can use a Virtual Background and configure it with Presentation mode settings. When you are not sharing or presenting, your current video layout will reflect the attendees’ view.
Setting the video layout
When not sharing or presenting, attendees will always see the same video layout as the host. Click the drop-down button at the top right and select the video layout you want your attendees to see. You can choose between gallery or speaker views.
Using Virtual Background
Using a Virtual Background will leverage how hosts would look like to their attendees.
- When you have started a webinar, click More > Virtual Background.

- Select your preferred background image. You can select from a blurred background or preset images. You can also add a video, GIF, or click the plus button to upload an image.

- You can tick the checkboxes beside options under Virtual background settings:
- Mirror my video: Checking the box will make your appearance in mirror mode. You will see yourself as you do in a mirror. Attendees will see you correctly, even if you will see them backward. Your video and virtual background are mirrored by default. The other meeting participants will see you normally (un-mirrored). If you turn this setting off, you will see yourself as others see you.
- Improve my appearance with the virtual background: Checking the box will improve your appearance with your chosen background. Your video will automatically tune video brightness to better correspond to your selected background and make you appear more realistically inside the virtual background scene. This setting will not be available if you are using a green or blue screen.
- Click on Green or Blue if you wish to use a green or blue screen for your background.
- You can also adjust the Color similarity when needed.
Configuring Presentation mode
Configuring the Presentation mode will leverage how your shared screen will look like to your attendees.
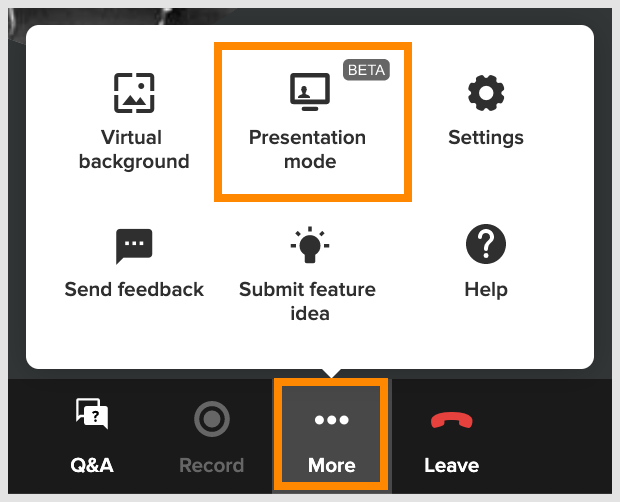
- When you have started a webinar, click More > Presentation mode.
- Choose from the different presentation modes:
- Overlay: Allows you to show your camera while using your presentation as the background. You can use this feature via your web browser. You can also adjust the transparency of your video to make sure you’re not covering up any important information.
- Glassboard: Makes you look like you’re behind your presentation by making your video transparent through primarily white or black colors in your presentation. This works with online white-boarding tools or with any presentation of consistent color (mostly white or mostly dark).
- Newsroom: Designed to give you the most presentation real estate while keeping your video to the side and ensuring it doesn’t overlap with your presentation. You can control the size of your video and presentation. You can also set the horizontal position of your video, either left or right.
- Glassboard: Gives your presentation a more immersive feeling, like you’re in a real conference room. Make sure your camera is positioned far enough from you to provide a realistic perspective. You can also control the size of your video.

-
Choose an option for I have a green or blue screen. You can choose between Off, Green or Blue.
- You can also adjust the Color similarity when needed.
© 1999-2022 RingCentral, Inc. Tous droits réservés.