Setting your RingEX work schedule
Last updated on May 11, 2022
Your work schedule determines how incoming calls are handled. You can choose a 24/7 schedule that applies to all incoming calls, or create a custom schedule to handle calls differently depending on the day and time.
Where do you want to set up your work schedule?
Desktop & web
Mobile
Admin Portal
- Open the RingCentral app on your desktop or web browser.
- Go to Settings > Phone in the left navigation bar.
- To the right of Call handling, click Edit.

- Click Edit schedule.

- Choose your schedule type:
- Always available (24/7): Sets up all incoming calls to be handled the same way 24 hours a day, seven days a week.
- Specific work schedule: Allows you to set your work schedule. Then, you can set different call handling rules for calls that arrive during work hours and calls that arrive after hours.

- If you choose Specific work schedule:
- Set the start and end times for each workday. On days you’re not available, select Closed from the dropdown list. If you’re available all day, select Open 24 hours.
- To apply a start and end time across multiple days, click Apply to and choose Weekdays or All days.
- Choose your Time zone.

- Click Save.
- Open the RingCentral mobile app.
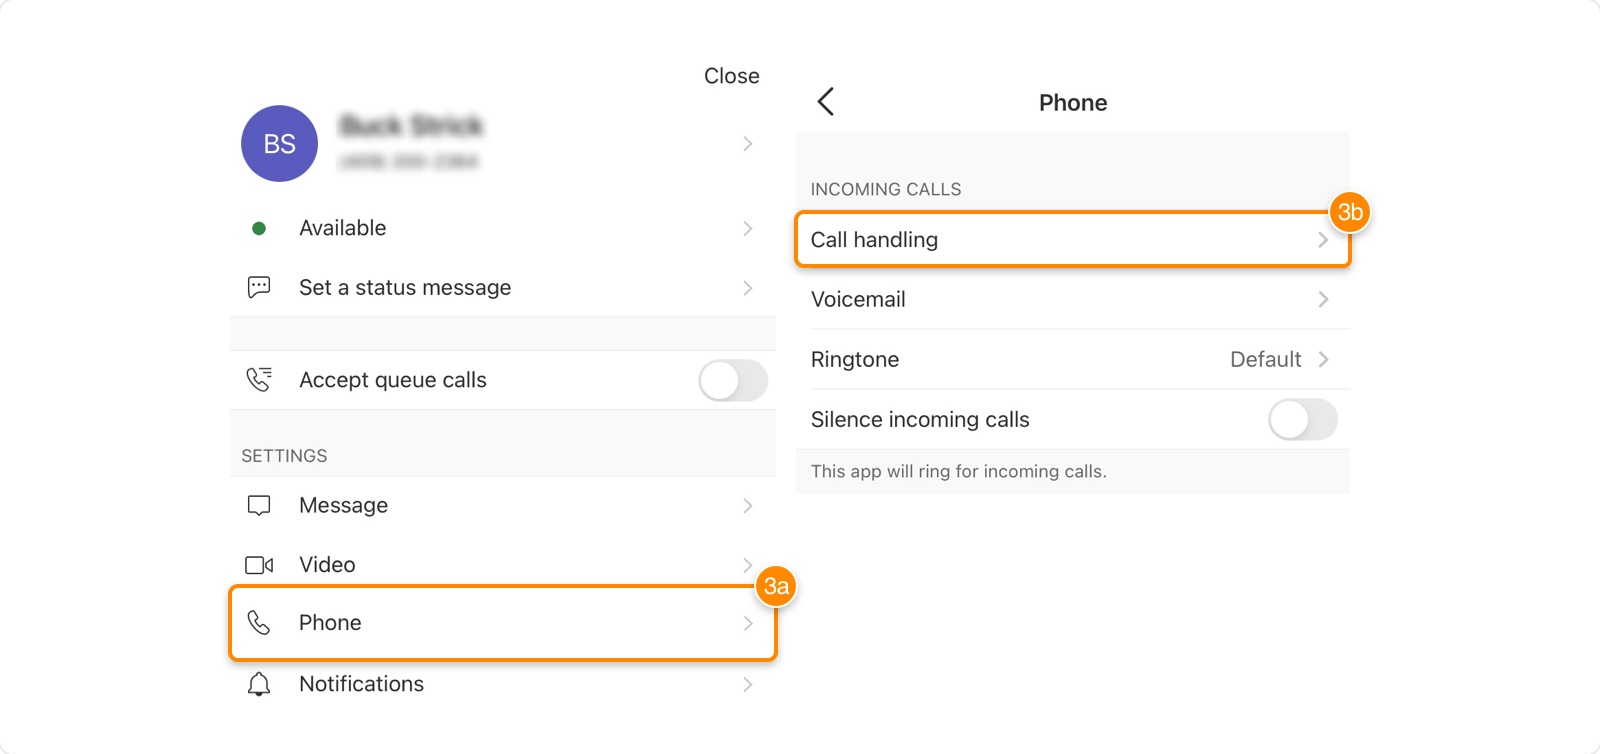
- Tap your profile picture in the top left corner.
- Tap Phone > Call handling.

- Tap Set schedule.

- Choose your schedule type:
- 24 hours: Sets up all incoming calls to be handled the same way 24 hours a day, seven days a week.
- Custom schedule: Allows you to set your work schedule. Then, you can set different call handling rules for calls that arrive during work hours and calls that arrive after hours.
- If you choose Custom schedule, tap each day to set the start and end times for each workday.
- Choose your From and To times to set your work hours for that day. On days you’re not available, turn off the Include [day] as a workday toggle.
- Tap Apply these hours to weekdays or Apply these hours to all days to apply this schedule across multiple days.

- Choose your Time zone.

Any changes made to your schedule are saved automatically.
- Go to the Admin Portal and sign in.
- To set your schedule:
- a. If you’re an admin, click Admin Portal > My Extension in the top right, then click Settings in the top menu.
- b. If you’re not an admin, click Settings in the top menu.
- To set another user’s schedule:
- a. Click Users in the top menu.
- b. Select a user from the Users with Extensions list.
- To set your schedule:
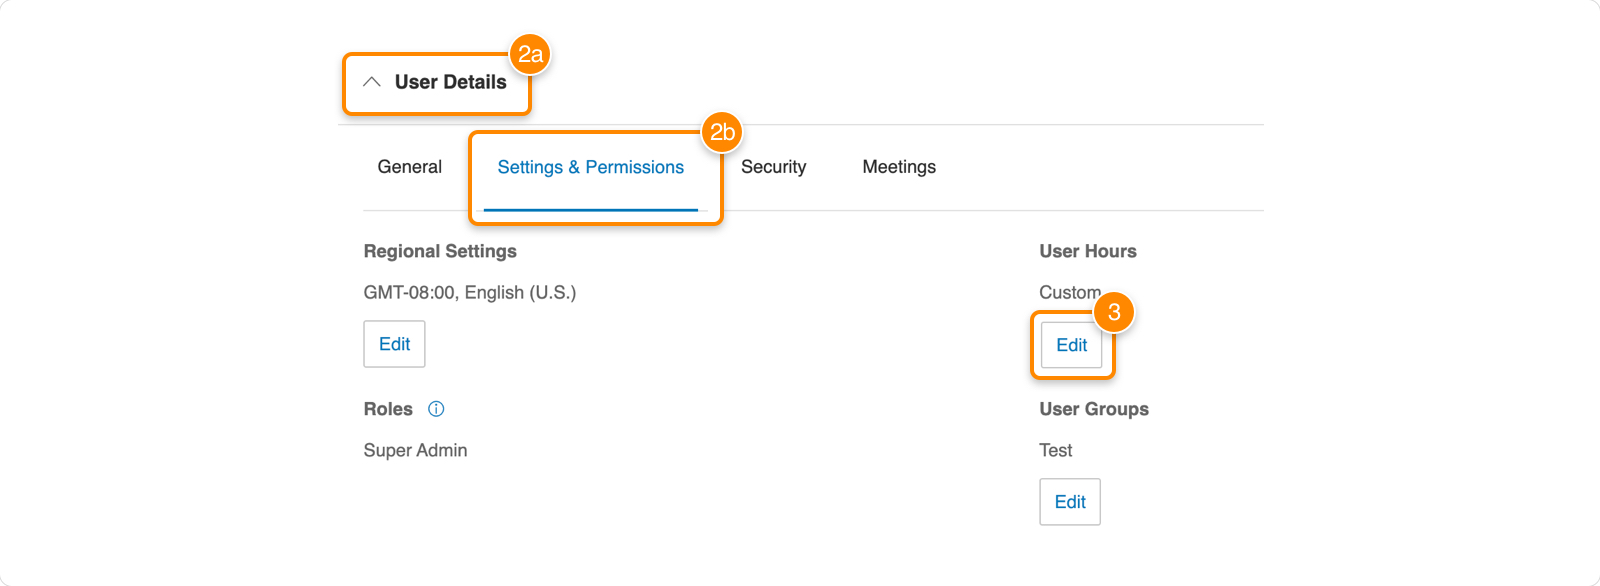
- Select User Details > Settings & Permissions.
- Click Edit under User Hours.

- Choose your schedule type:
- 24 hours: Sets up all incoming calls to be handled the same way 24 hours a day, seven days a week.
- Custom schedule: Allows you to set your work schedule. Then, you can set different call handling rules for calls that arrive during work hours and calls that arrive after hours.
- To apply custom start and end times across multiple days
- Set the start and end times for each workday. On days you’re not available, click the toggle on the left of that day. If you’re available all day, check 24 hours for that day.
- To apply a start and end time across multiple days, click Apply to and choose All weekdays or Every day.
- Click Save.
- Set your time zone.
- Click Edit under Regional Settings.
- Select your Time Zone.
- Click Save.
