Setting up One Touch Dial
Last updated on November 17, 2021
You can enable an easy-to-join button on Polycom devices by setting up One Touch Dial (OTD) to connect to RingCentral Room Connector and seamlessly join RingCentral Video meetings.
Requirements
Note: For Cisco devices connecting via One Touch Dial (OTD), an additional Poly license may be required.
Connecting your calendar
- Log into the OTD administration portal, and then click Sign In.

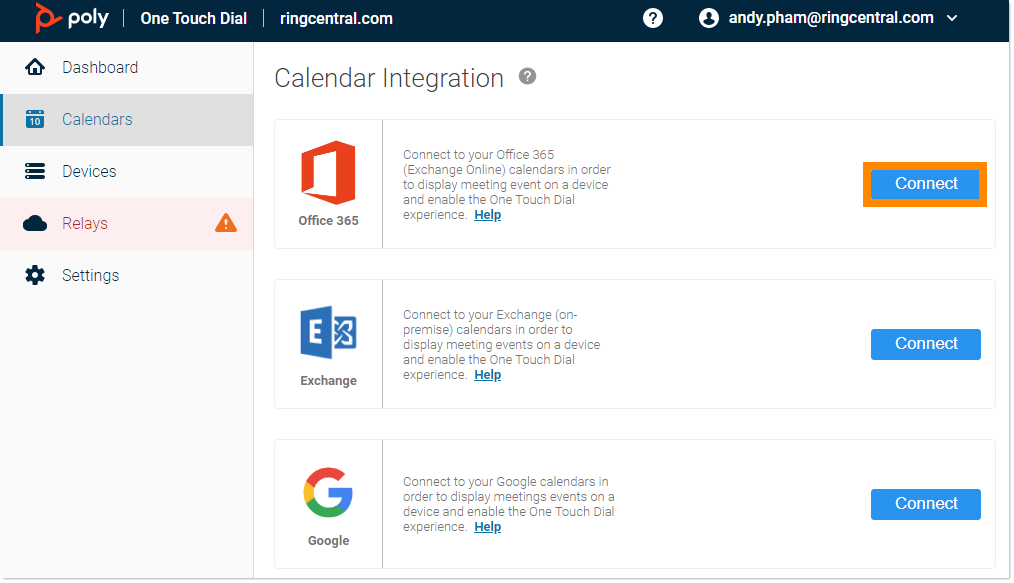
- Click Calendars from the left-hand navigation bar.
- Select the Connect button next to the appropriate calendar you want to connect to.

- Click Test to confirm and test your connection. A successful test means the OTD has adequate rights to read the calendar folder.

Note: Depending on the device and vendor, the configuration may be different. Certain deployments may require additional elements such as a Cloud Relay.
Setting up your device
- Click Devices from the left-hand navigation bar, then select Connect a Device.

- Select the appropriate device.
- Enter the Calendaring Email and Name.
- Click Create.
- Select Copy All Credentials to copy the credentials for a later step.
- Click Finish.
Note: Once the device is created, OTD automatically generates and presents a set of credentials you will need to enter into your endpoint. OTD places the device in a pending stage until the device is configured and registered to the OTD.
Configuring your device
Note: Although the configuration of the Poly Group Series looks similar, there may be a slight difference depending on the brand and model of the video endpoint.
- Log in to the web user interface of your device.
- Select Servers > Calendaring Service.
- Select Enable Calendaring Service.
- Paste the credentials you saved earlier into the corresponding fields.
- Input http://otd.plcm.vc./ into the Microsoft Exchange Server field.
- Select Save.
- Refresh the page and ensure the registration status is Registered.
Checking if the device successfully connected
- Log into the OTD administration portal, and then click Sign In.
- Click Devices from the left-hand navigation bar.
- Check the status of the device under Status.

You can also check by clicking the pencil icon at the far right to see additional status information.

Note: Once the configurations are completed and scheduled meetings are synched, the video endpoint displays a touch-to-join for each meeting.