Desktop & web

Creating a Google service account and key file
Last updated on April 14, 2021
If you’re trying to use the Calendar Migration Tool to migrate your RingCentral Meetings invites to RingCentral Video in your Google Calendar, you must create a Google service account and an associated key file to get authorization from Google.
Note: Your Google account must have admin permissions to create a Google service account. You must also have admin access to your RingCentral company account to run the Calendar Migration Tool.
Once you’ve set up a Google service account and created a key file, you can then begin to migrate your RingCentral Meetings invites in Google calendar to RingCentral Video meeting invites. To learn more, visit Using the Calendar Migration Tool on Google meeting invites.
Creating a Google service account and key file
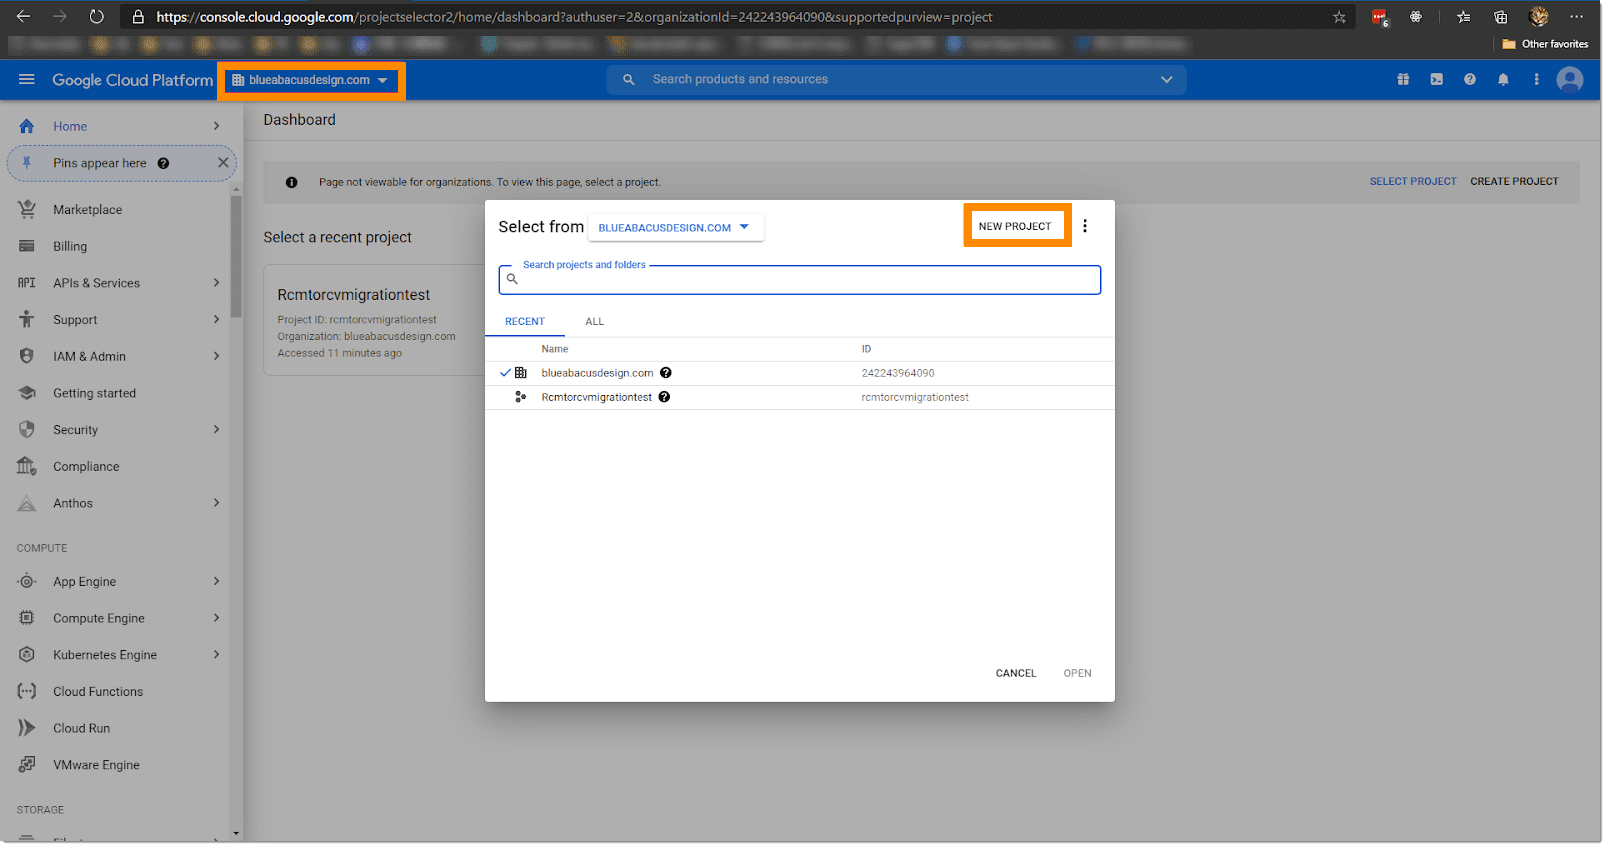
- Navigate to the Google Cloud Console and log in using your Google admin account.
- Click on the project selector and click New Project.
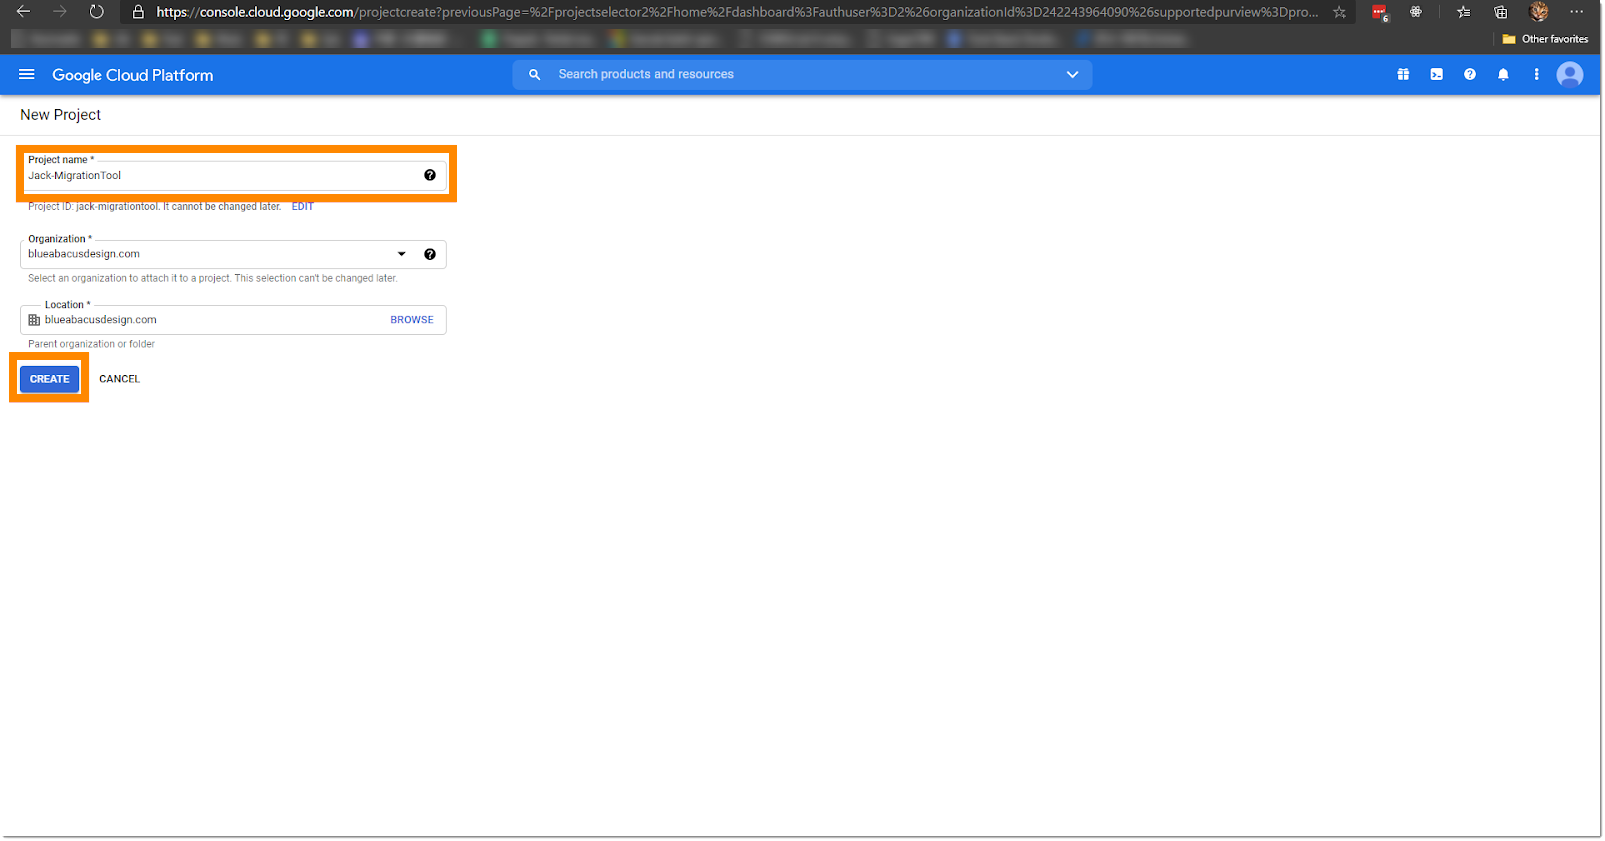
- Enter a project name, organization, and location, and then click the Create button.
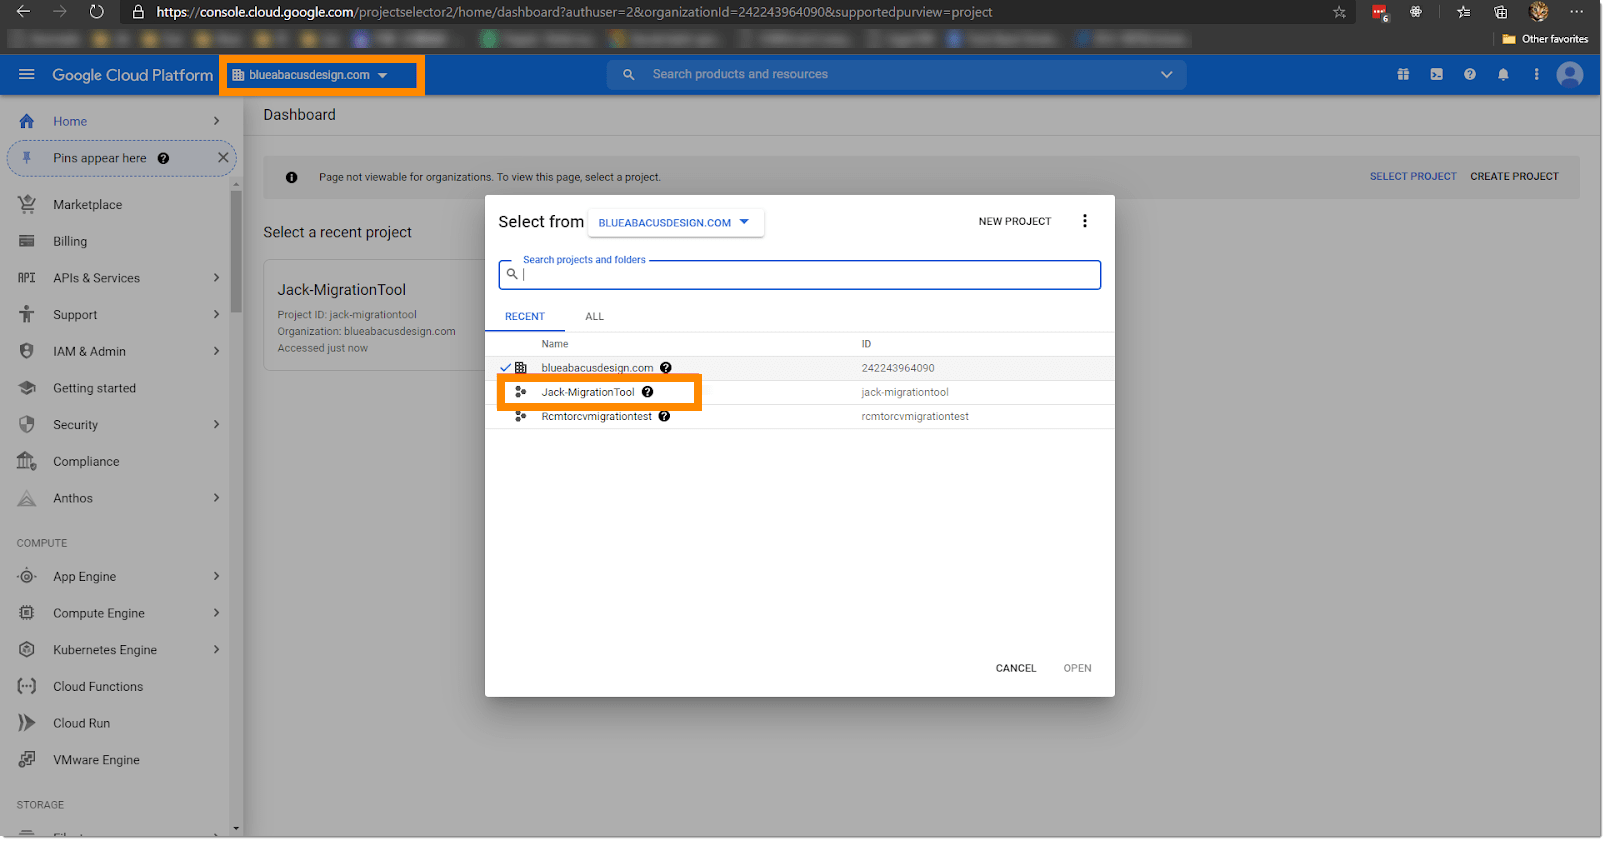
- Once the project has been created, go to the project selection drop-down menu and open the new project you’ve created.
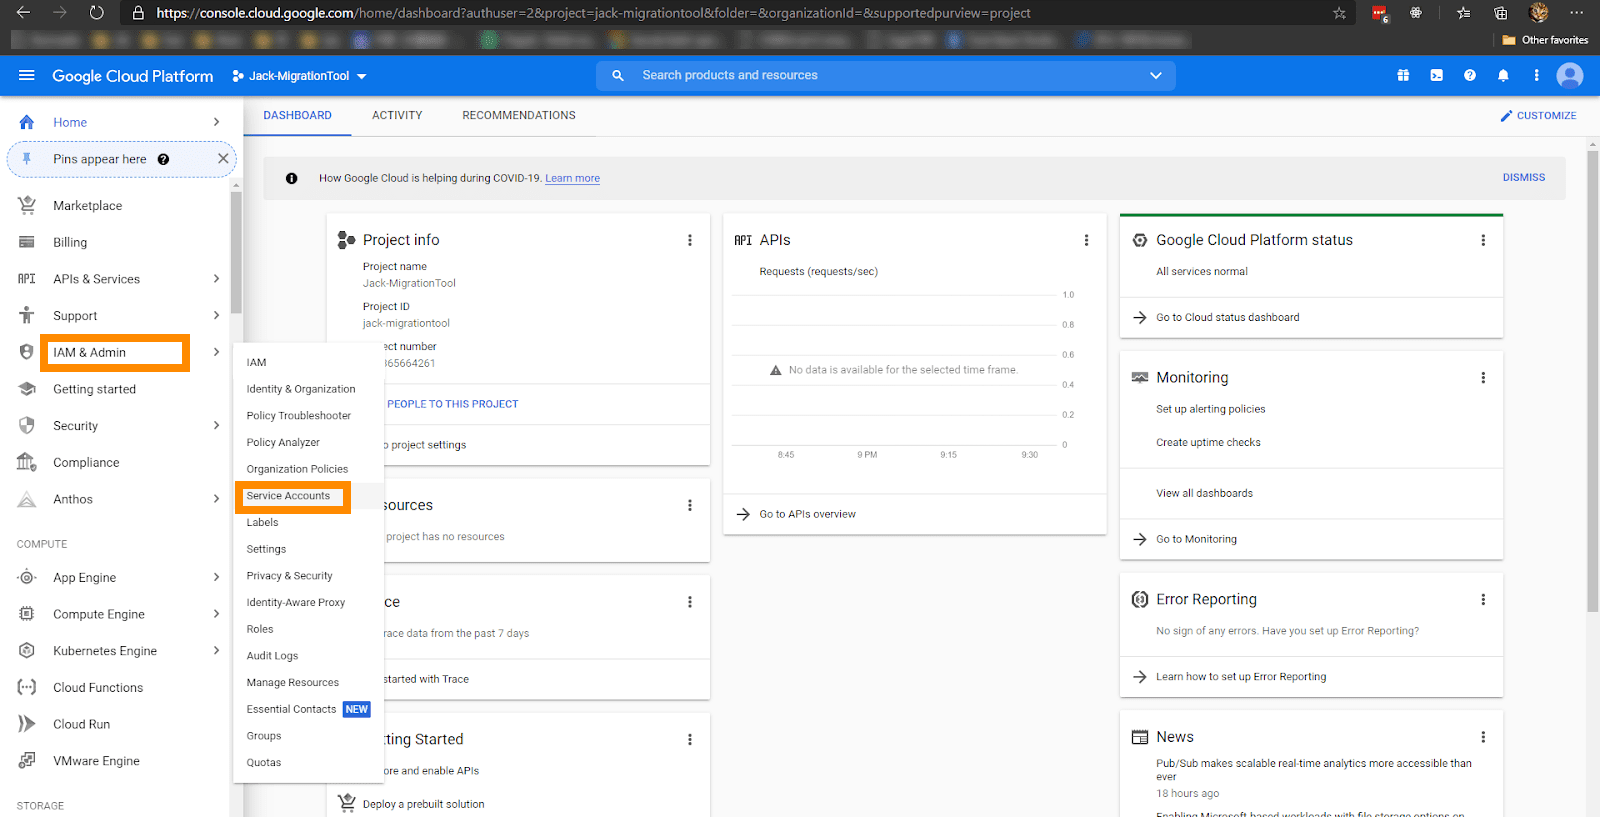
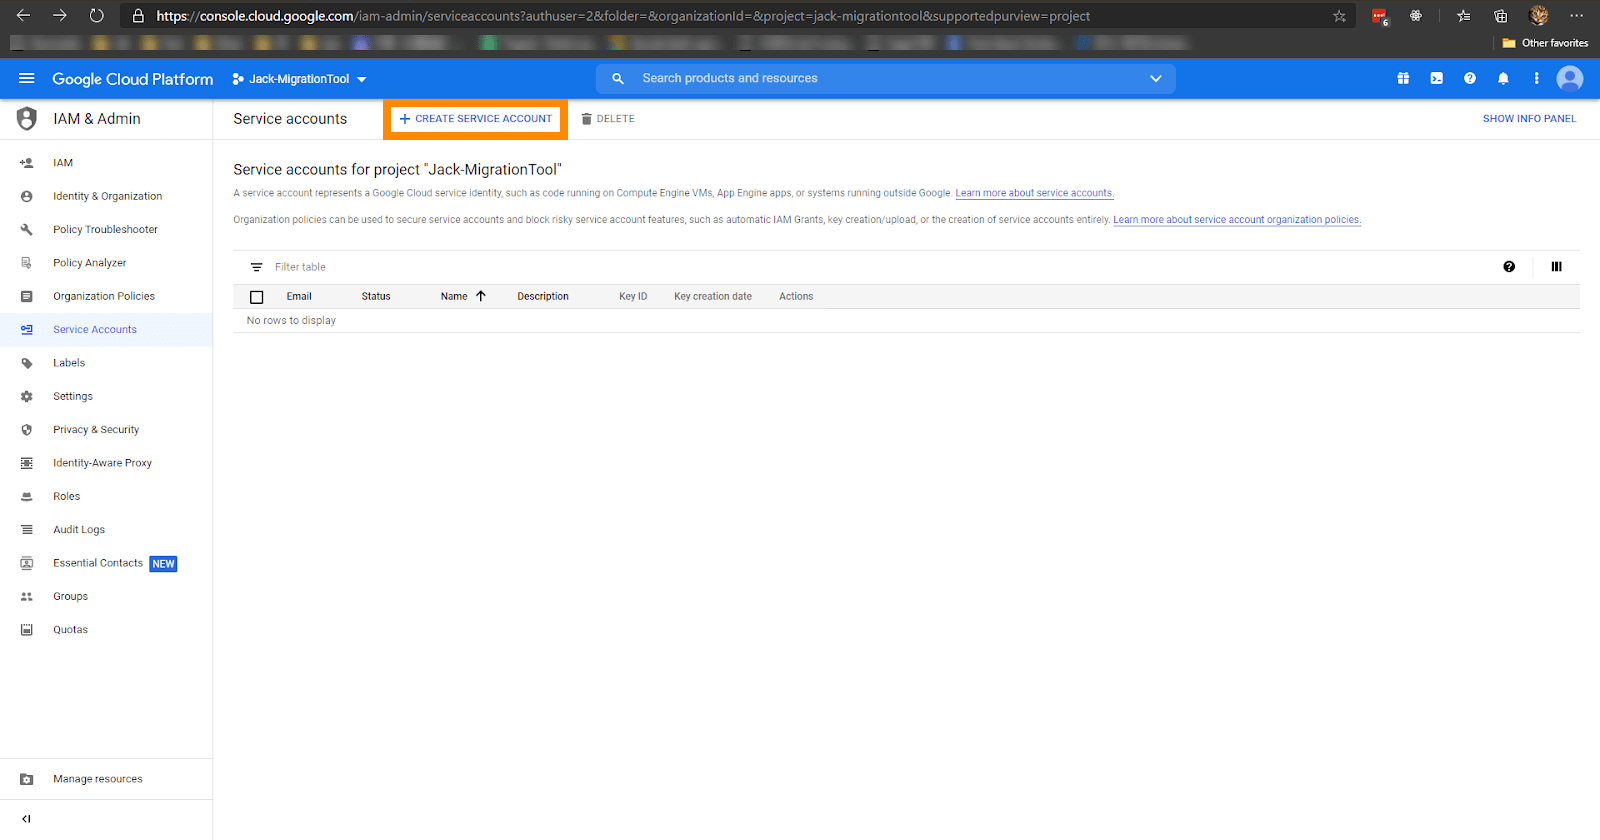
- On the side menu, navigate to IAM & Admin, and then select Service Accounts.
- Click Create Service Account.
- Enter a Service account name, Service account ID, and Service account organization, and then click the Create button.

- Open a new browser tab.
- Navigate to the Google Admin site. From the side menu, click Security, and then select API Controls.

- Click Manage Domain Wide Delegation at the bottom of the API controls page.

- Navigate to the Google Cloud Console tab and click the new service account.

- Copy the Unique ID to the clipboard.
- Go back to the Google Admin tab, and click Add new in the Domain-wide Delegation page.
- Enter the unique ID from the service account in the Client ID field.
- On the OAuth scopes field, enter https://www.googleapis.com/auth/admin.directory.user.readonly,https://www.googleapis.com/auth/calendar, and then click the Authorize button. You’re now done with the Admin Console page.

- On the Google Cloud Console tab, navigate to IAM & Admin, and then click Service Accounts.
- Under Keys, click Add Key. Ensure that the Key type is set to JSON, and then click the Create button.

- The browser will prompt you to save the key file to your computer.

- Once you’ve saved the key, navigate to API & Services > Dashboard > Enable APIS and Services.

- Type calendar on the search field.

- Double click the Google Calendar API from the results, and then click the Enable button.

- Type admin SDK on the search field.

- Double click Admin SDK API from the results, and then click the Enable button. Once done, the key file is created with the right service account and API permissions to use the migration tool.
© 1999-2022 RingCentral, Inc. Tous droits réservés.