Desktop & web

Deploying RingCentral Scheduler Outlook add-in to
users with XML file from Office 365 admin center
Last updated on September 09, 2021
With the RingCentral Scheduler Outlook add-in, you can quickly add a meeting to any new or existing calendar event.
There are several ways users can install this Outlook add-in:
- Admins can deploy RingCentral Scheduler on behalf of their users. They can deploy RingCentral Scheduler either by
- using the Office 365 admin center add-in store,
- deploying an XML file via Office 365 admin center if the add-in store is not accessible,
- or using Exchange Admin Center for On-Premise Exchange Microsoft accounts.
- Users can also install RingCentral Scheduler add-in to their Outlook instead.
Note: This article covers how admins can deploy RingCentral Scheduler to all users if the add-in store is not available or accessible.
Deploying for other users with XML file from Office 365 admin center
RingCentral Scheduler can be deployed using the XML file if you do not have access to the Microsoft add-in store.
- Sign in to Microsoft Office 365 with your administrator account.
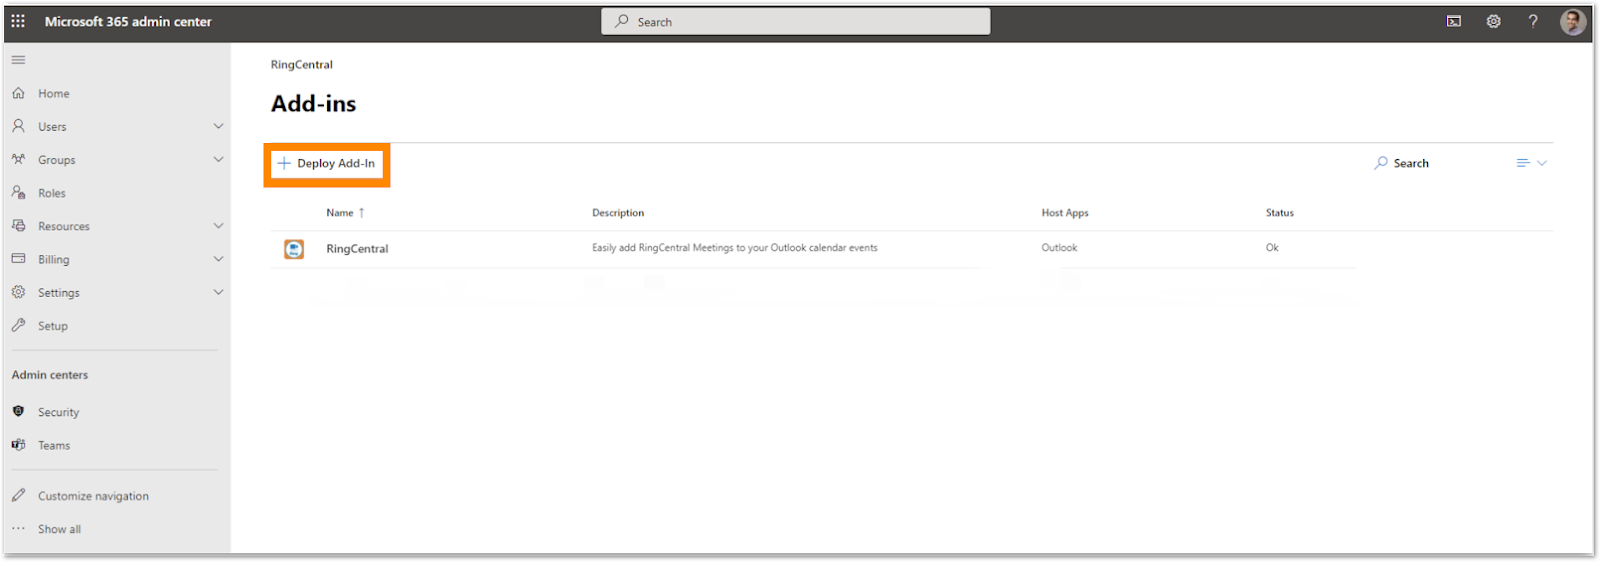
- Navigate to Settings > Service & Add-ins via the left navigation bar.
- Select Deploy Add-in located at the top of the page.
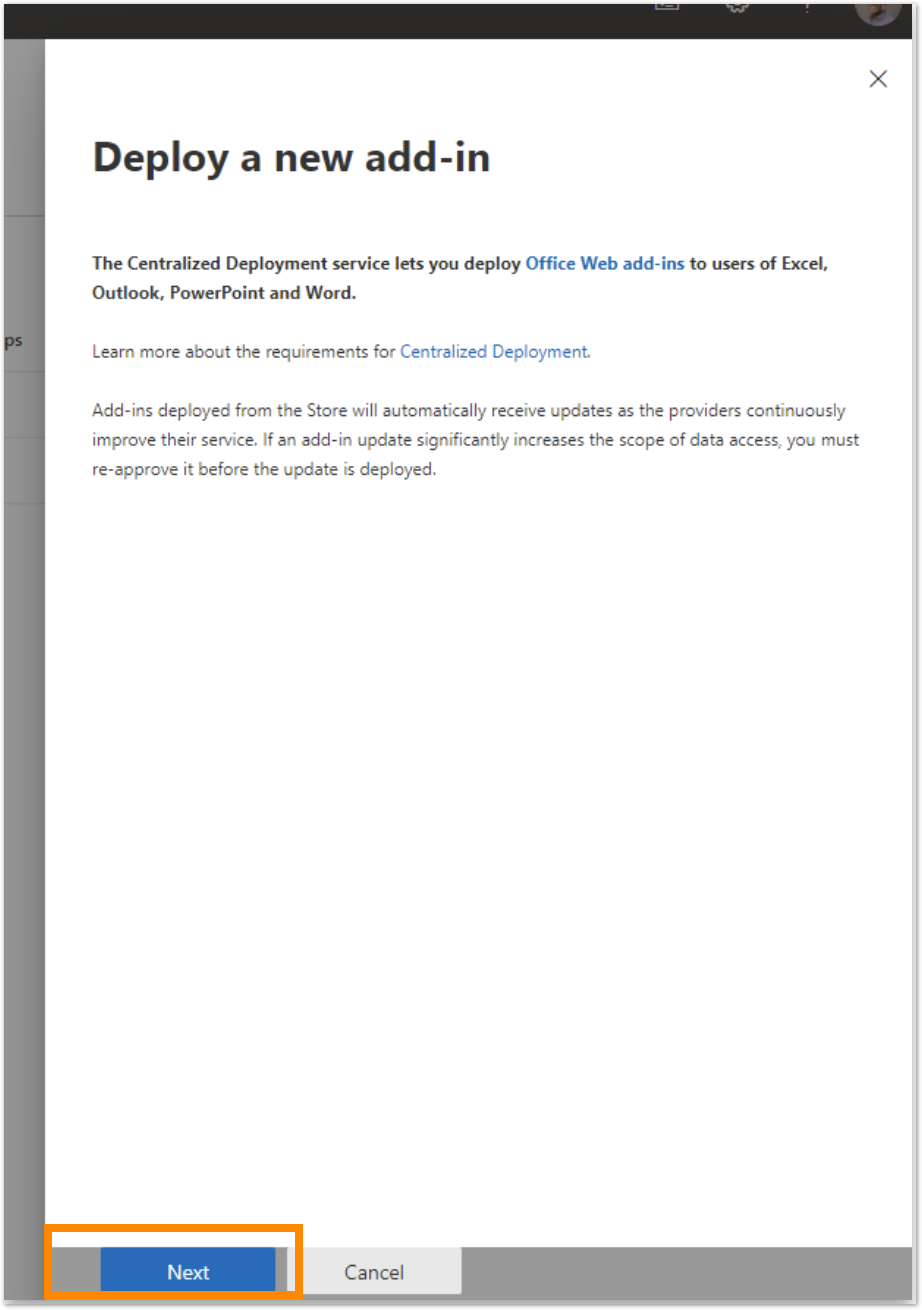
- On the Deploy a new add-in page, click Next.
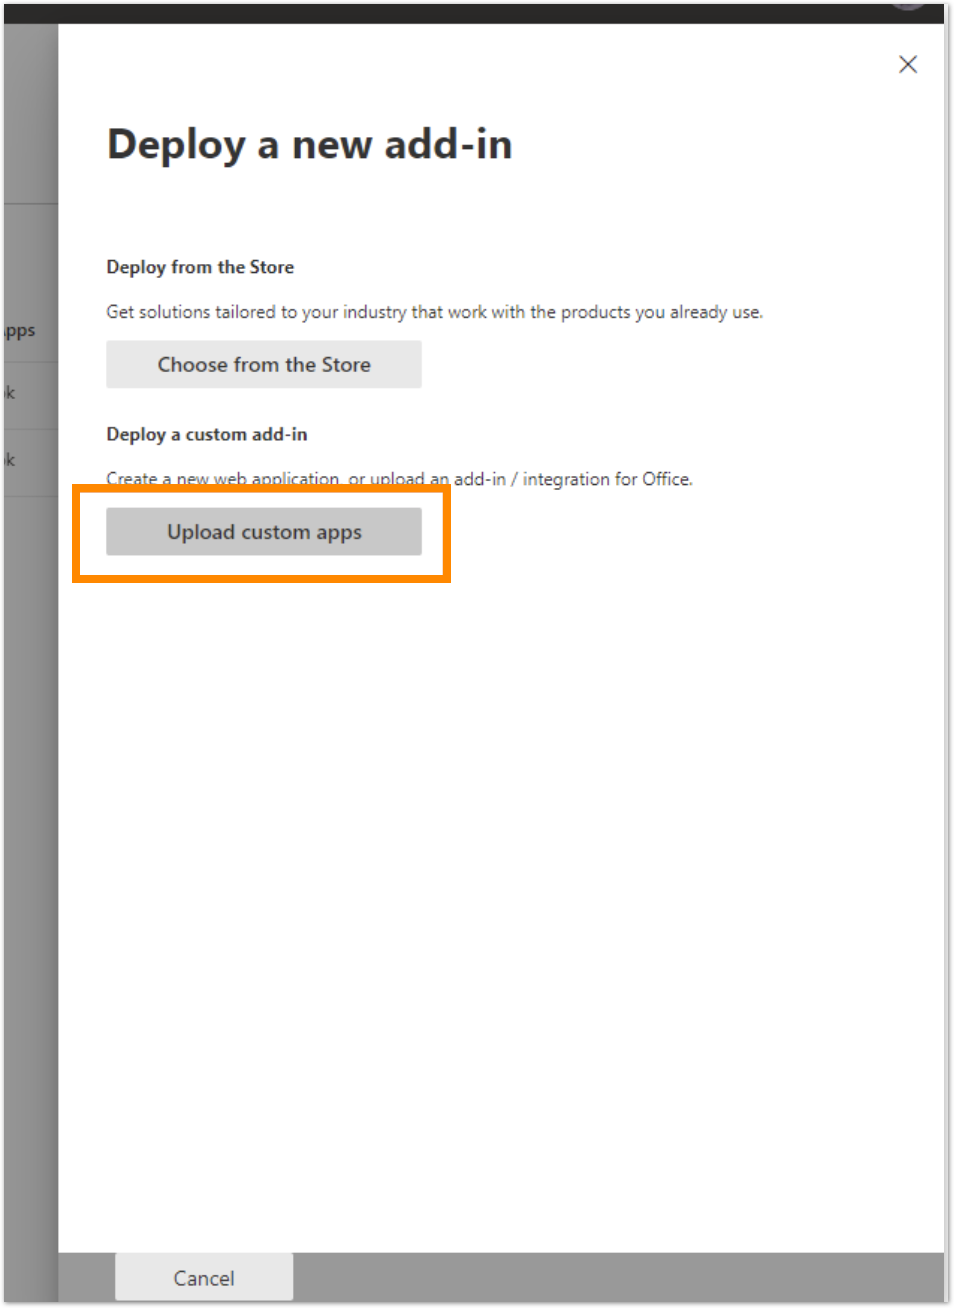
- Click Upload custom apps.
- Select I have a URL for the manifest file, then enter: https://apps.ringcentral.com/integration/office-add-ins/prod/rc/manifest.rcv.xml

- Click Upload. The add-in is now enabled.
- In Who has access, select Edit to specify who the add-in is deployed to.
- On the Edit who has access page, select either Everyone
OR
Select Specific users / groups, then enter the name to search for users.

- When finished, click Save.
- Review the add-in settings, then click Close.
Note: After deployment, Outlook add-ins can take up to 12 hours to become available to your users.
© 1999-2022 RingCentral, Inc. Tous droits réservés.