
Engage Digital | Integrating with Google Dialogflow
This integration requires:
- An instance of Engage Digital
- A user with administrative rights on the Engage Digital instance
- A supported chat channel (see Supported messaging channels) to use with the Engage Digital instance
- A RingCentral account and a RingCentral user account with administrative rights
- A Google user account (preferably, one generic account per client)
- Optionally: a billable Google Cloud account
Setting up Engage Digital for Google Dialogflow
In this procedure, you will create a new non-SSO Engage Digital user that will hold API keys and have the same set of permissions as a bot. You will also need to set up the necessary access rights to a specific channel for this user and create the categories for initial and fallback routing. For security purposes, you will generate an API access token to connect Engage Digital to Google Dialogflow.

Creating an Engage Digital agent with channel access rights
1. Navigate to Users > Agents via the left-hand navigation bar.
2. Click New agent to create a new non-SSO Engage Digital user.
3. Enter a name and email address for the user.
4. Select Administrator the Role dropdown menu.
5. Do not check the SSO only (no password) box.
6. Click Save.
7. Click the Edit permissions lock icon next to the agent.
8. Grant the necessary access rights to a specific channel for this user.
To learn more about creating an Engage Digital agent and agent permissions, read Creating an agent and Updating agent permissions respectively.

Creating categories for Google Dialogflow
1. Navigate to Routing > Categories via the left nav bar.
2. Create a category that will be used for initial routing to a bot:
a. Click Add.
b. Enter a Name. For example, AI_Greeter_bot.
c. Leave the default Type as Skill category.
d. Choose the Selected channels the categories apply to.
e. Click Save.
3. Create a category to be used as a fallback:
a. Click Add.
b. Enter a Name. For example, AI_Greeter_bot_fallback.
c. Leave the default Type as Skill category.
d. Choose the Selected channels the categories apply to.
e. Click Save.
4. Repeat steps 2-3 to create additional categories as needed.
Go to Creating categories to learn more about creating categories and their configuration options.

Create an API access token for accessing the Engage Adapter App
1. Navigate to Dev Tools > API access tokens via the left nav bar.
2. Click Add.
3. Leave Enabled checked.
4. Enter a Description related to this integration.
5. Select the Agent that you previously created.
6. Click Save.
7. Click the Edit pencil icon on the newly created token.
8. Copy the Token string.
See Connecting Engage Digital and Google Dialogflow to learn how this API access token is used.
Setting up the Google Dialogflow chatbot agent
You will configure Google Dialogflow by setting up a new chatbot agent or using an existing chatbot agent. You then define a number of intents – these are topics and the customer questions that fall under each topic – that the chatbot agent will use to categorize messages and handle a complete conversation. You will identify intents where you may want to hand over a conversation to a human agent and enhance them by adding one output context to each.
Google Dialogflow also supports custom business logic. If needed, you can also set up a fulfillment provider for custom business logic using Dialogflow standard practices. For example, see Create fulfillment using webhook in the Google Dialogflow documentation.

Creating the Google Dialogflow chatbot agent
1. Access the Google Dialogflow console at https://console.dialogflow.com/api-client/#/login.
2. Log in using your generic Google account.
3. Click Create Agent.
4. Enter an Agent name as a string with no whitespaces.
5. Click Create.
Once your first chatbot agent has been created, you can see all the Dialogflow console functions enabled. The primary configuration you will need to perform will be configuring the Intents that help handle a conversation.

Configuring Google Dialogflow intents
1. Identify an intent which you want to hand over a conversation to a human agent.
2. Click Create intent.
3. Enter a descriptive Intent name.
4. Expand the Contexts menu.
5. Click Add context.
6. Add an input context to the intent, if desired.
7. Add an output context to the intent using any name.
8. Click on the small circle near the output context's label and set a Lifespan of 1.
9. Click Save.
10. Repeat steps 7-9 to add more output contexts to an intent as needed.
After defining the settings, you can use the console at the far right to test your contexts.
Configuration settings for Google Dialogflow intents
- Intent name: A name used to identify the intent.
- Add input context: If you configure an output context in the Engage Adapter App, enter the value here.
- Add output context: An output context that will be mapped to an Engage Digital category.
- Lifespan: The number of conversational turns for which the context remains active. Must be 1.
Connecting Engage Digital and Google Dialogflow
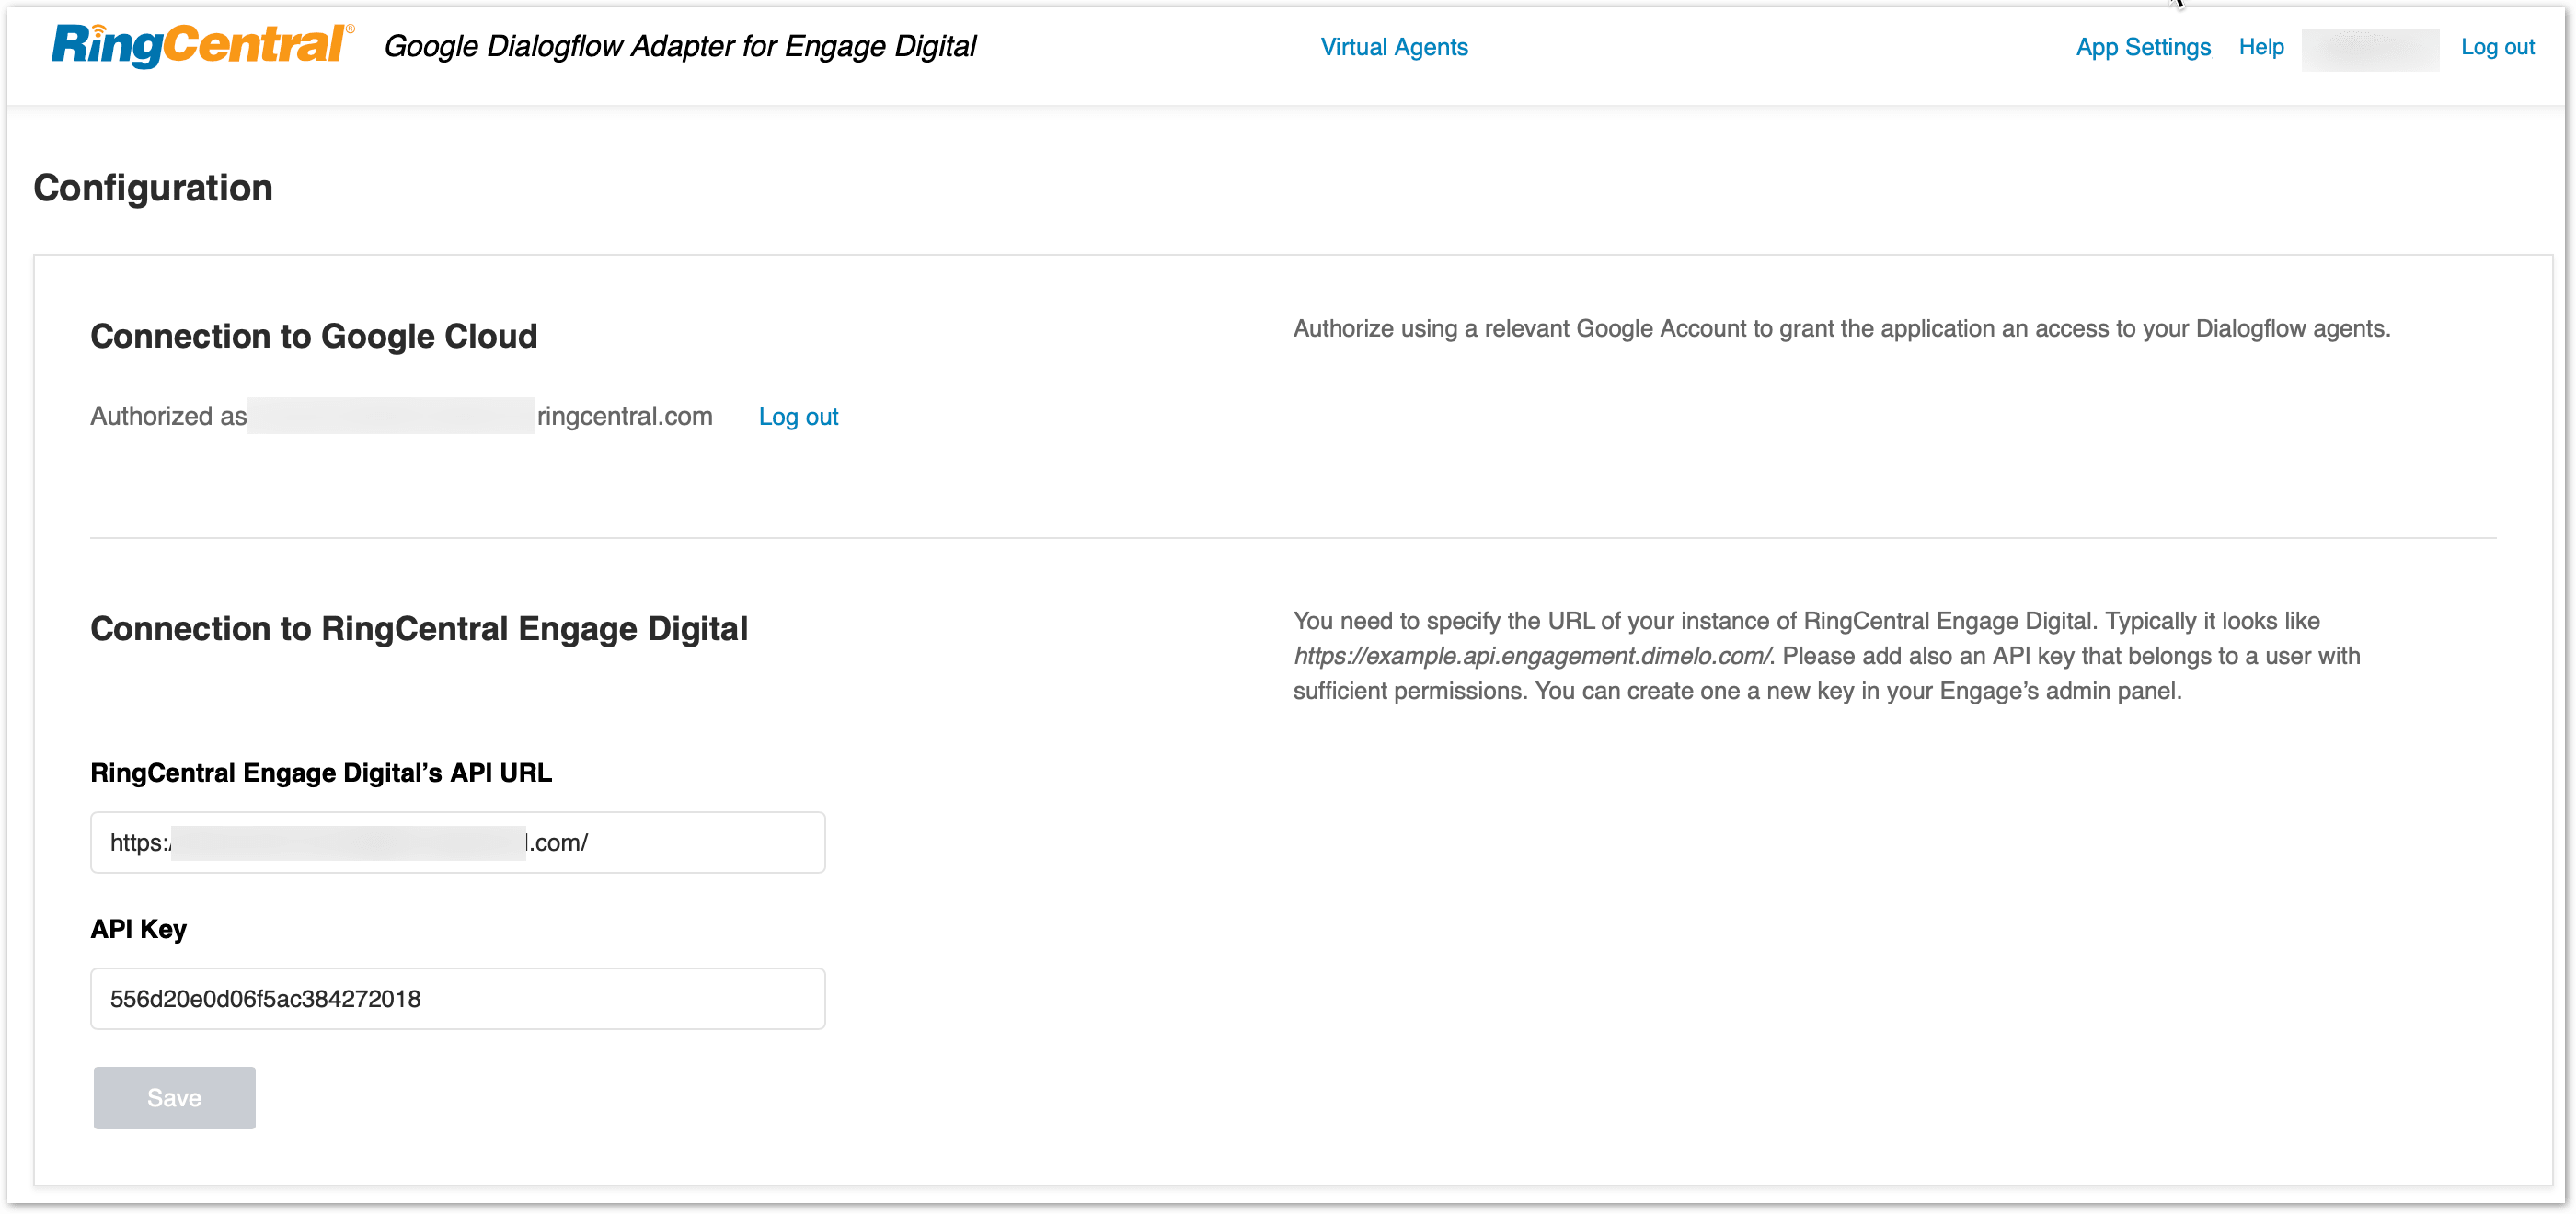
1. Access the Engage Adapter App at https://edf.ringcentral.com.
2. Log in using your RingCentral user with administrator credentials.
3. Log in with your Google credentials to authorize the integration to use your Google account.
4. Enter the URL of your Engage Digital instance and paste your API key.
This completes the basic integration of connecting Engage Digital to Google Dialogflow. See Configuring integration settings.
© 1999-2022 RingCentral, Inc. Todos os direitos reservados.