Setting your fax notifications
Last updated on May 20, 2022
You can configure notification settings to send an email or text message when you send or receive a fax. You can set notifications for yourself, or an admin can set them for others. Admins must have User Management permissions to make notification changes.
When setting your fax notifications, you can choose to configure either basic or advanced notification settings. Advanced settings have more options for customizing notifications, whereas basic settings help to set up simple notifications.
Do you want to configure basic or advanced fax notification settings?
Basic settings
- Go to the Admin Portal and sign in.
- To set your fax notifications:
- i. If you’re an admin, click Admin Portal > My Extension in the top right, then click Settings in the top menu.
- ii. If you’re not an admin, click Settings in the top menu.
- To set another user’s fax notifications:
- i. Click Users in the top menu.
- ii. Select a user from the Users with Extensions list.
- To set your fax notifications:
- Go to Notifications > Messaging Notifications.

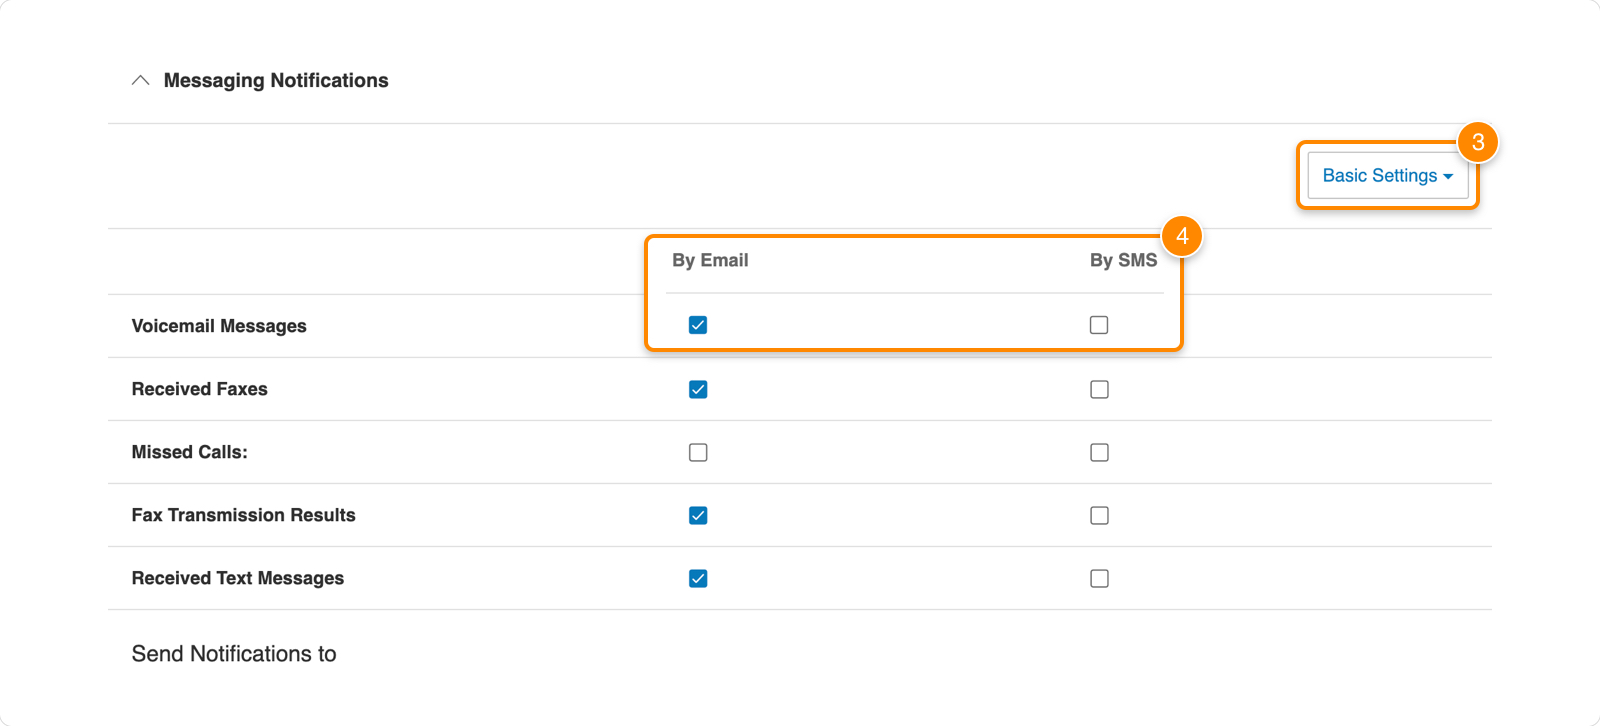
- Select Basic Settings from the dropdown in the upper right.

- Check the box under By Email or By SMS next to the notification you’d like to receive.
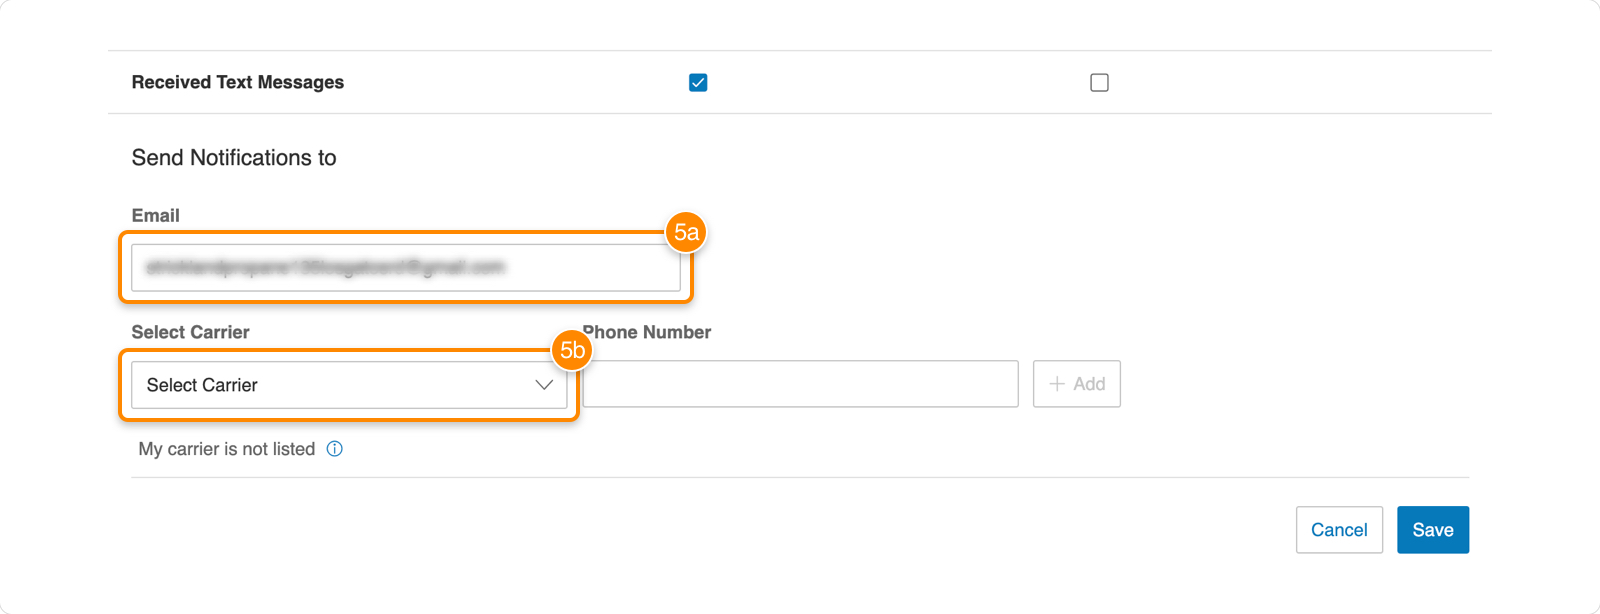
- Under Send Notifications to, enter the email address or phone number where you’d like to receive notifications.
- Email: If you want to receive email notifications, enter your email address under Email.
- Text message: If you want to receive text message notifications, select a carrier from the Select Carrier dropdown and enter your phone number. Click Add to enter multiple numbers.

Note: If your carrier isn’t listed, contact the carrier’s customer service department and ask for an email address where you can receive text messages. For example, [email protected]. Then enter that email address under Phone Number.
Advanced settings
For advanced settings when customizing your notification preferences:
- Go to the Admin Portal and sign in.
- To set your fax notifications:
- i. If you’re an admin, click Admin Portal > My Extension in the top right, then click Settings in the top menu.
- ii. If you’re not an admin, click Settings in the top menu.
- To set another user’s fax notifications:
- i. Click Users in the top menu.
- ii. Select a user from the Users with Extensions list.
- To set your fax notifications:
- Go to Notifications > Messaging Notifications.
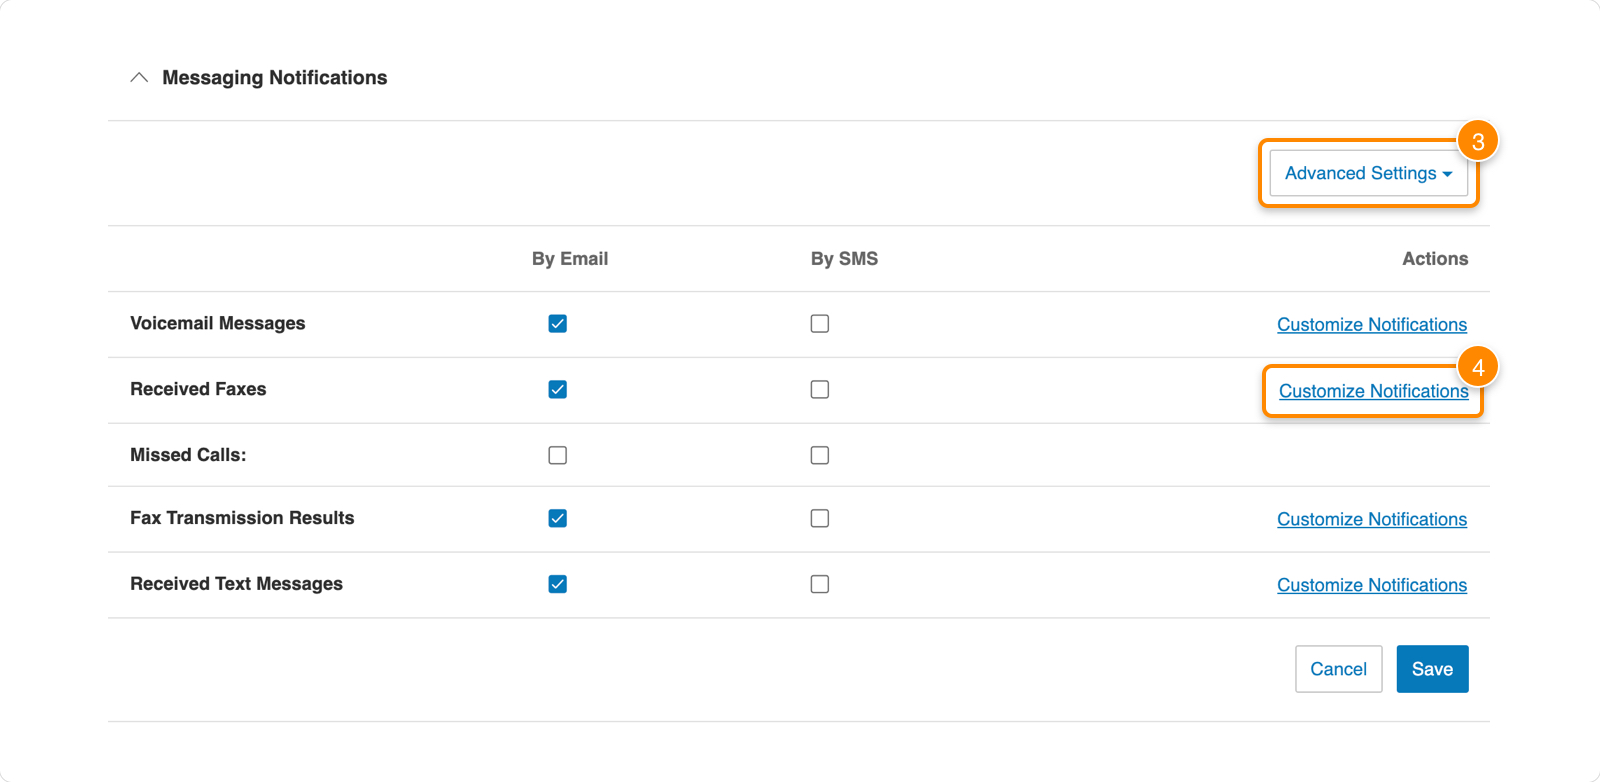
- Select Advanced Settings from the dropdown in the upper right.

- Check the box under By Email or By SMS next to the notification you’d like to receive.
- Go to Received Faxes. Under Actions, click Customize Notifications.
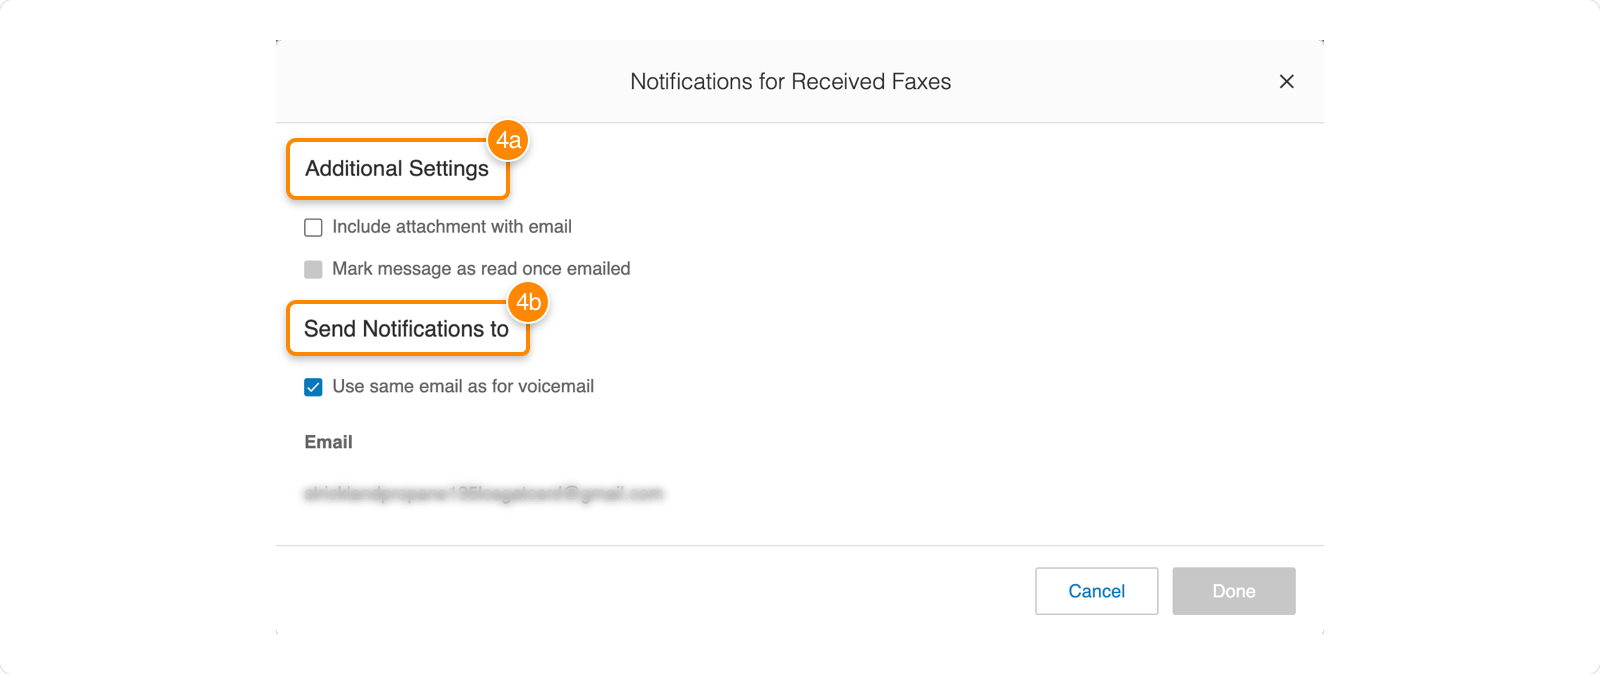
- Under Additional Settings, select whether you want to:
- i. Include attachment with email: Attach a PDF file of the fax to your email or text message notification.
- ii. Mark message as read once emailed: Mark the notification as “read” once it’s received.
- Under Send Notifications to, check the box Use same email and text address as for voicemail if you want to receive an alert about faxes at the same email and/or text address as you use for voicemail. To be notified at a different email and text address, leave the box unchecked and enter your preferred contact information, then click Done.
- Under Additional Settings, select whether you want to:
Note: If you only have email checked under Messaging Notifications on the previous screen, Send Notifications to checkbox will read Use same email as for voicemail. The same will apply if you only have SMS checked under Messaging Notifications, with the checkbox Use same text address as for voicemail.

- Go to Fax Transmission Results. Under Actions, click Customize Notifications.
- Select whether you want to send the notification to the same email and/or text address where you receive voicemail notifications. To be notified at a different email and text address, leave the box unchecked and enter your preferred contact information, then click Done.

© 1999-2022 RingCentral, Inc. Todos os direitos reservados.